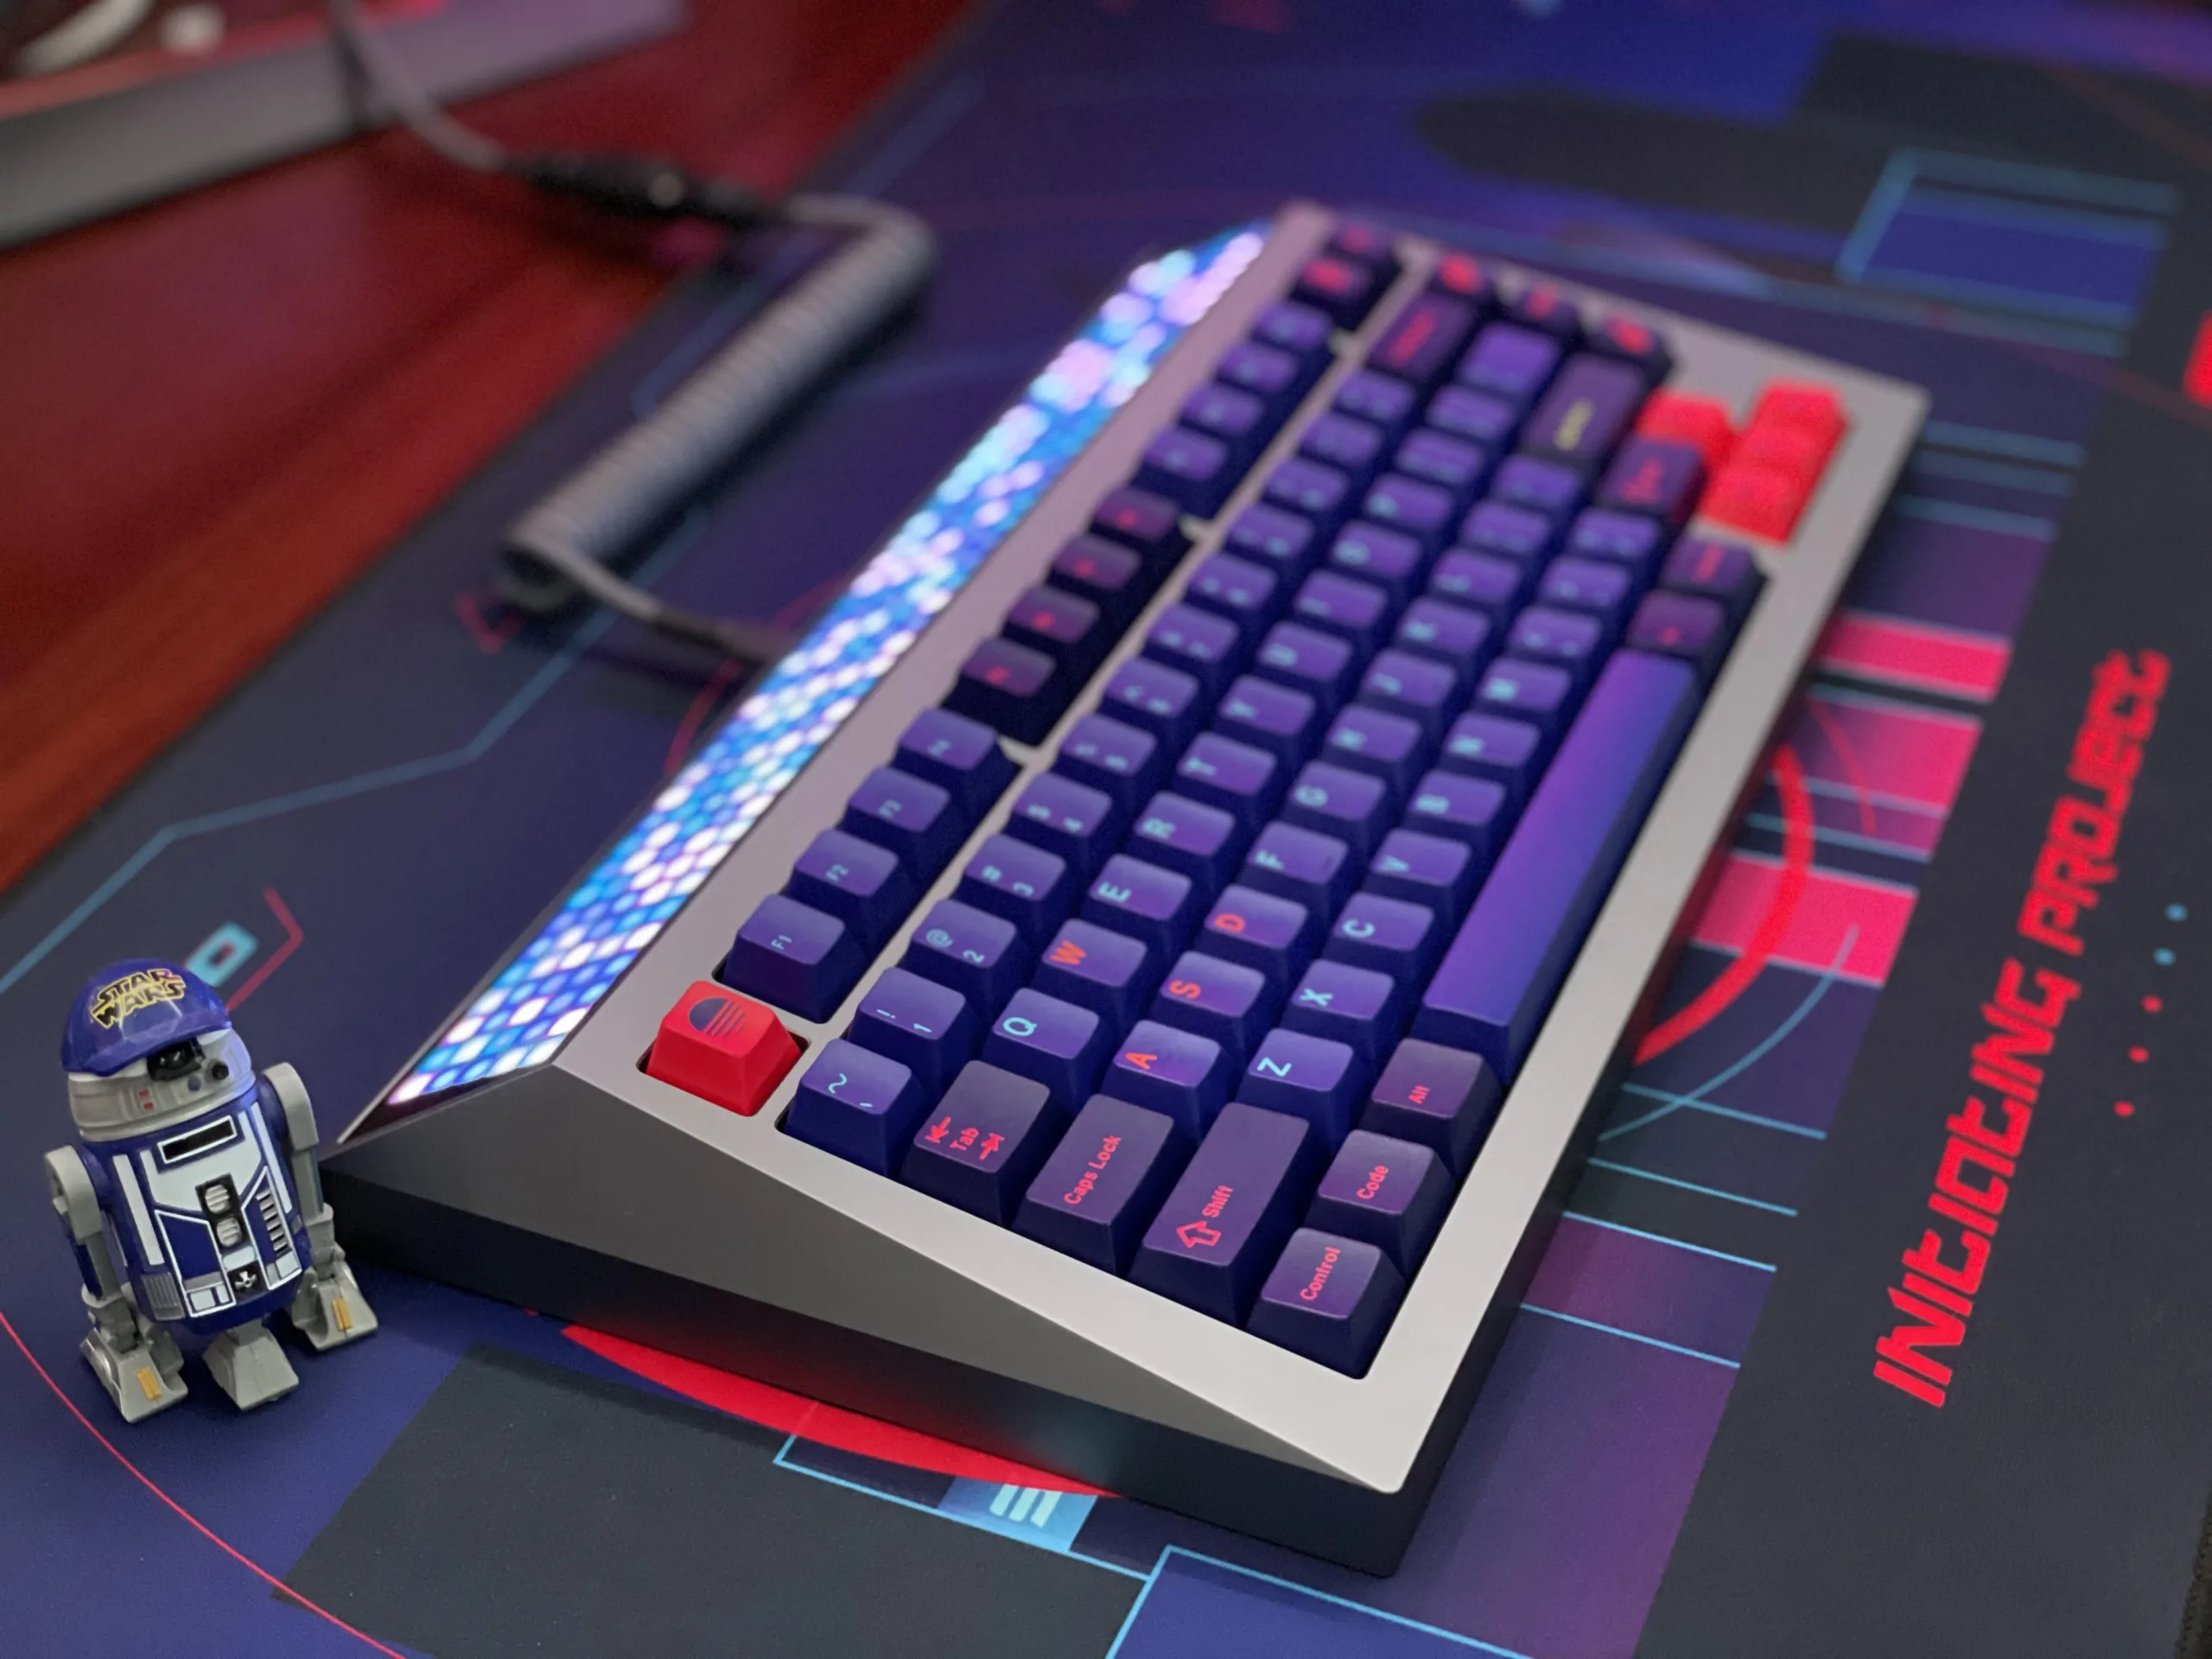
The elements in your space can determine your performance and productivity. Over the years, I’ve always found myself trying to personalize all the equipment in my work/game space, from the color profiles on my monitors, the height and seating angle of my chair, to even the weight of my wireless mouse. Still, it seems as though I’ve missed something, the thing which I interacted with the most, the center piece of the desk, the input source from mind to machine. The keyboard, I’ve forgotten about the keyboard. Until one day, a friend of mine showed me his custom mechanical keyboard, and I found myself down a rabbit hole. There were so many pieces to the puzzle and information I had to source from different places, it became an information overload. But after finally sorting and digesting everything I’ve gathered, I’ve finally built that “centerpiece”, and it changed everything. This is the guide I wish I had when I first discovered the world of Custom Mechanical Keyboards.
Affiliate Disclosure: We may or may not earn a commission with links provided in this article, all commissions earned helps support our work and comes at no cost to you.
Table of Contents
Before You Start
Why Build Custom
Putting aside all the productivity/performance talk. Let’s discuss why exactly would you want to spend the time, resources, and energy to build a custom mechanical keyboard when there are cheap, mass-produced options on the market.
The Look
If you’re someone who’s all about aesthetics, it can be very difficult to find a keyboard that’ll match your current setup. Unless of course, you have a mono-toned theme. Still, having a little bit of contrast can make the day or night. Building a custom keyboard can present you with the flexibility to create something that will fit in and elevate your current space.
The Sound
A good keyboard, ASMR. A bad keyboard, a broke down car. – Yours Truly
The Feel
How Fast do You Want It
If you were inspired by someone’s custom build and thought to yourself, “I want those parts too.” Chances are, some of the parts might not be available. Buying keyboard parts divides into the follow two routes, Group Buys or In-stock Parts.
Group Buys
If you want that super custom part, look for group buys to join. But do note that the steps for a group buy starts from Interest Checks (IC), and ICs may sometimes not manifest into a group buy at all if there aren’t enough people willing to shelve out the cash. ICs can take weeks or even months to turn into a group buy, and the group buy duration window may drag your timeline even further. But if you’re not in a rush and want something unique that only a handful of people will have, go the group buy route.
In Stock Parts
On the flip side, if you want to jump into business ASAP, you’re going to better off buying in-stock parts. Sure, they might not be as “custom” as the group buy parts, but you’ll at least have something in the meantime and not waiting months to put something together.
How THICC is Your Wallet
Before you scratch the itch and swipe that credit card, keep in mind that building a custom keyboard can cost on an average of $200-$500 dollars. It all comes down to your personal preferences. Not to say you can’t build something good for less than $200, it’s just going to be easier for someone with a thicker wallet, sadly life is Pay to Win. Prices are going to differ based on component material, number of switches you need, tools you have, and other various factors. Generally speaking, The bigger the castle, the bigger the battle; the same applies to keyboards, as you’re going to spend extra on additional switches, stabilizers, keycaps, and hey, maybe you run out of lube. However, the benefit of going DIY is the possibility of upgrading parts down the road. You could even use the older parts to build multiple custom mechanical keyboards and displaying them in your bedroom museum.
The Tools List
This is a general list of what you are going to need to build your dream keyboard. I’ve broken it down to 3 tiers. The Essential kit is does not include a soldering kit, so go with the “I’m going to solder” Kit if you want to solder from the get go. Personally I highly recommend a Hot-Swappable PCB as your first build instead of soldering, since soldering will require additional tools at an extra cost. You’ll definitely need a fume extractor if you’re not trying to breathe in that cancer.
Recommendations
The Essential Hot-Swap Kit
All the essentials you’ll need to get started, recommended if you’re opting for the Hot-Swappable build path.
The “I’m going to solder” Kit
This is the kit to get if you want to solder your first build. If you want a manual screwdriver instead, any precision set should do.
The Enthusiast Kit
You’re just flexing at this point. If your wallet is thick and want premium tools for the job, this is the list for you.
If you want to shop yourself
Essentials
- Switch Puller
- Precision Screwdriver Kit
- Wire Keycap Puller
- Switch Opener
- 00 Size Paintbrushes
Add-On
- Pronged Pick-up Tool
- Magnetic Holding Trays
- Wire Cutters
- Scissors
- Desk Mat
Soldering Essentials
- Soldering Iron
- Solder Sucker
- Solder Wire
Soldering Add-On
- Soldering Stand (If you’re not buying a station)
- Heat Insulated Mat (Optional)
- Fume Extractor
The Components
Choose a Keyboard Size
You’ve probably seen the various sizes and shapes of keyboards on the market. Perhaps you’re someone who’s bought a full-sized keyboard because you wanted “more RGB”, but is now regretting that decision because you were privileged enough to have never worked as a cashier to learn the Numpad. Or maybe you’re someone who tried to save desk space and then realized you’re now missing your arrow keys. Or maybe, even maybe, you’re actually scripting and want a million macro keys (no one actually uses them btw). Fret not, we’re going to help you make an excellent choice.
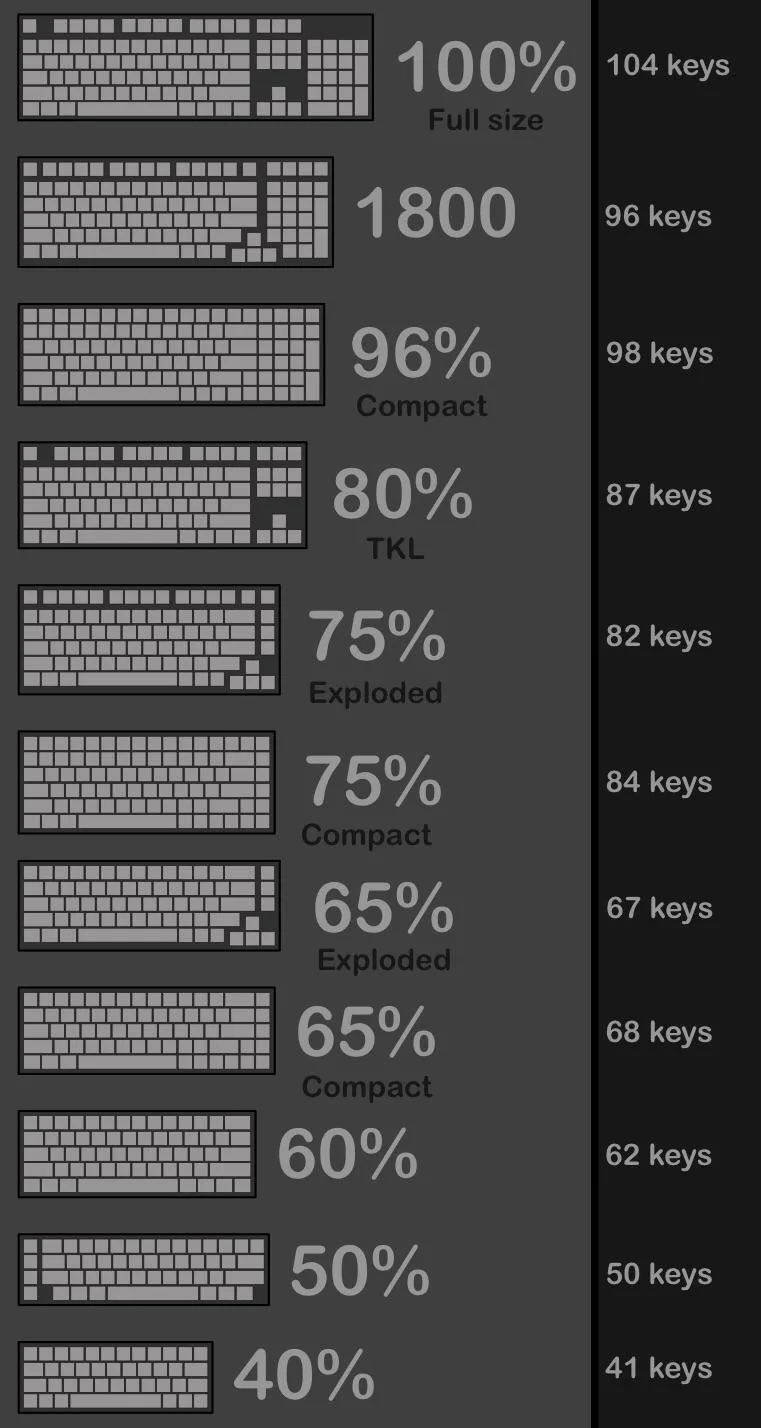
Infographic by u/Minehacks
There are tons of different options when it comes to keyboard sizes. But notably the most popular sizes are 65%, 75%, and 80% when it comes to Custom Mechanical Keyboards. Overall, it also depends on what you need/use. If you’re someone that does quick math, and actually uses the Numpad, we still recommend going for a more compact 65% or 75% layout and buy a separate detachable Numpad, since we’re going to assume you’re not doing your taxes 24/7. Unless of course you want “more RGB”.
As for the rest of us, you cannot go wrong starting off with a 80% Tenkey less (TKL) layout. This will ensure that you are still getting a customized option with a familiar layout with extra desk space for your mouse flicking activities.
However, if you’re going for that minimalistic aesthetic, we would recommend the Compact option of either the 65% or 75% sizes. They are also the most popular sizes within the custom keyboard community.
Lastly, for anyone that’s trying to regain some keys, we recommend actually looking at what keys you actually use or would use, and getting the size which contain those keys and nothing more.
Personally, I’ve opted for the 75% size for a little bit “more RGB” compared to the smaller sizes. Additionally, I never find myself using any of the macro keys or the function keys above the arrow keys on a Full Size layout. Not to mention the Numpad, I’ve never met anyone that actually uses the Numpad (maybe we’re just bad with numbers).
Switches

If you’re already familiar with mechanical keyboards, or you currently own one, then you’re probably no stranger to the concept of mechanical switches. If not, expand on the info section below for a quick definition.
A mechanical switch is a type of switch that is commonly used in keyboards to register key presses. It consists of a spring-loaded metal slider that makes physical contact with a metal dome or leaf when pressed, completing an electrical circuit and registering a key press. Mechanical switches are known for their precise and tactile feedback, as well as their durability and longevity. They are often preferred by gamers and typing enthusiasts for their high-quality feel and performance.
There are many different types of mechanical switches, each with its own unique characteristics and properties. Some common types of mechanical switches include Cherry MX, Kailh, Gateron, and Razer. The specific type of mechanical switch used in a keyboard can have a significant impact on the feel and performance of the keyboard. If you remember from above, one of the elements of why you’re choosing to build a mechanical keyboard is “The Feel”.
There are tree main types of switches
- Linear – Smooth consistent actuation throughout the keystroke, quiet operation
- Tactile – Distinct bump when activated, moderate noise, satisfying? (if you’re into that).
- Clicky – Distinct clicking sound when activated, loud noise (may be annoying in an office)
If you need a more in-depth explanation to the above and more, click here.
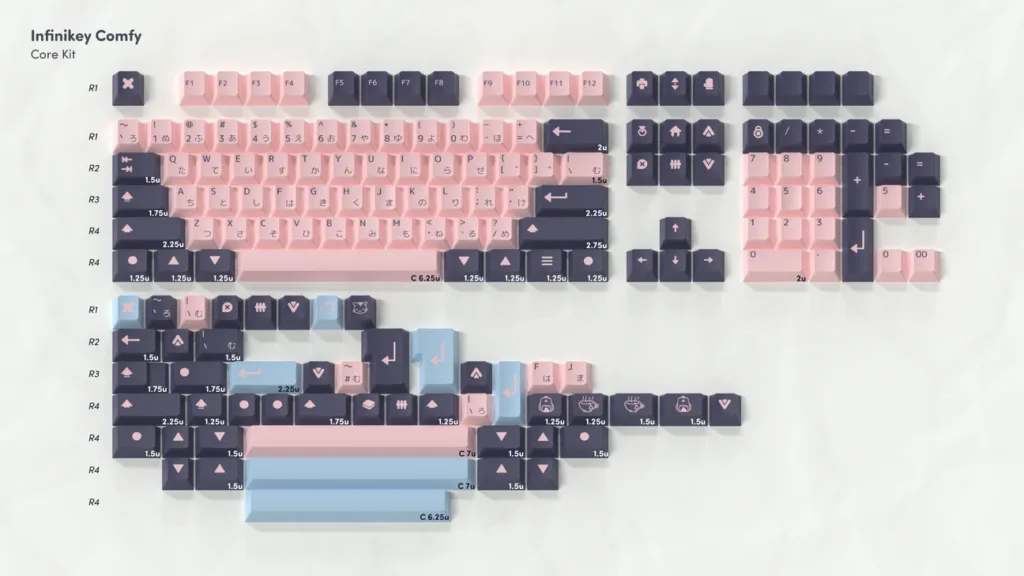
Based on what keyboard size you’ve picked from Step 1, refer to the image on roughly how many switches you’re going to need. For example, a 65% compact size is going to need 68 switches.
For an all around basic switch, we highly recommend the Gateron Milky Yellow Switches. These are very affordable linear switches for anyone looking to get into the hobby. There is also the Gateron Milky Yellow Pros which are an upgrade to their non-pro yellows, plus they come pre-lubed.
If you are a fan of RGB and want a full RGB experience, we recommend the KPREPUBLIC Everglide EG Aqua King Water King Linear Switch (try saying that 5 times fast). They have a clear polycarbonate housing to allow more light pass-through compared to the Gateron Yellows. You can’t go wrong with the 62g actuation variant as they are the most popular all around.
Finally, if you’re still unsure which switch you want to commit to, we recommend getting a Switch Tester and then commit to the one that tickle your senses. Feeling is Believing.
PCB
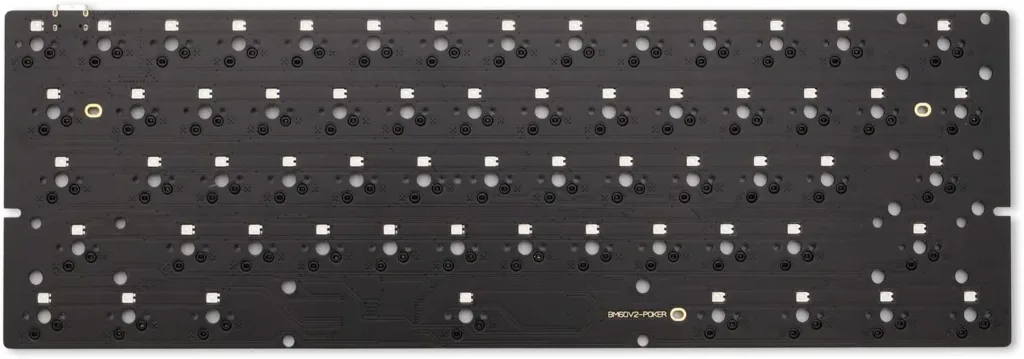
The PCB (printed circuit board) is an important component that serves as the foundation for the rest of the keyboard. The PCB is typically the first component that is installed, it is usually mounted to the bottom of the case and the switches are then soldered or plugged into the PCB. The PCB also has a microcontroller and firmware that control the keyboard’s functionality and features. Some PCBs also have additional features, such as programmable keys, built-in RGB, or USB hubs.
Decide on the features you would want before buying. Do you want Wireless, Bluetooth, or both? Perhaps you want to switch between Windows and Mac? Is RGB Important to you? Make sure to choose the right PCB for the job.
PCBs with Bluetooth and wired connection is referred to as Dual Mode. PCBs with Bluetooth, wired connection, and a Wireless dongle is referred to as Tri-Mode.
Generally, PCBs will come with the case you’ll decide to buy and is offered in two options, Hot Swap or Solder. Although you can buy PCBs separately, note that just because you picked a 65% size PCB doesn’t mean it’ll fit into every 65% case. You’ll want to refer to the manufacturer site for wherever you acquired your case from. We’ll explain all about Cases in Step 4.
But before that a quick comparison between Hot Swap and Solder PCBs.
PCB Types
Hot Swap PCB
Pros
- Easily add or remove components
- Reduced risk of damage vs soldering
- No need to buy soldering tools and materials
Cons
- Generally more expensive than the non hot swap PCB
- Might not be as reliable if subjected to heavy use or vibration
- Less layout customizability
Solder PCB
Pros
- More customization in terms of layout (split space bars, etc)
- More reliable since the contacts are soldered
- Solder PCB is generally cheaper
Cons
- Inconvenient when it comes to swapping out components
- Higher barrier to entry if you don’t already have soldering tools
- Risk of damage if you’re not experienced
Software
Lastly, you might sometimes see PCBs labeled as 1U, 2U, etc. This is because some keyboards might have unique features that are designed into the PCB such as a place for a knob or lighting. In these scenarios, pick the PCB with the U unit that matches the keyboard design. If you need an explanation of what the “U” refers to, expand on the section below.
The unit of measurement used for keyboard keys is the “U,” which is equal to the width of a key in a standard 19-inch rack. In other words, 1U is equal to 1.75 inches (44.45 mm).
In keyboard layouts, keys are typically arranged in a grid with rows and columns. The height of the keys is typically expressed in terms of the number of rows they occupy. For example, a key that is 1U tall will occupy 1 row of the grid, while a key that is 2U tall will occupy 2 rows. Keys are also available in other sizes, such as 1.5U, 2.25U, and so on.
1U keys are typically used for standard-sized keys, such as the alphabetic keys, numeric keys, and punctuation keys on a standard QWERTY keyboard. Larger keys, such as the space bar or the enter key, are usually taller than 1U.
Case
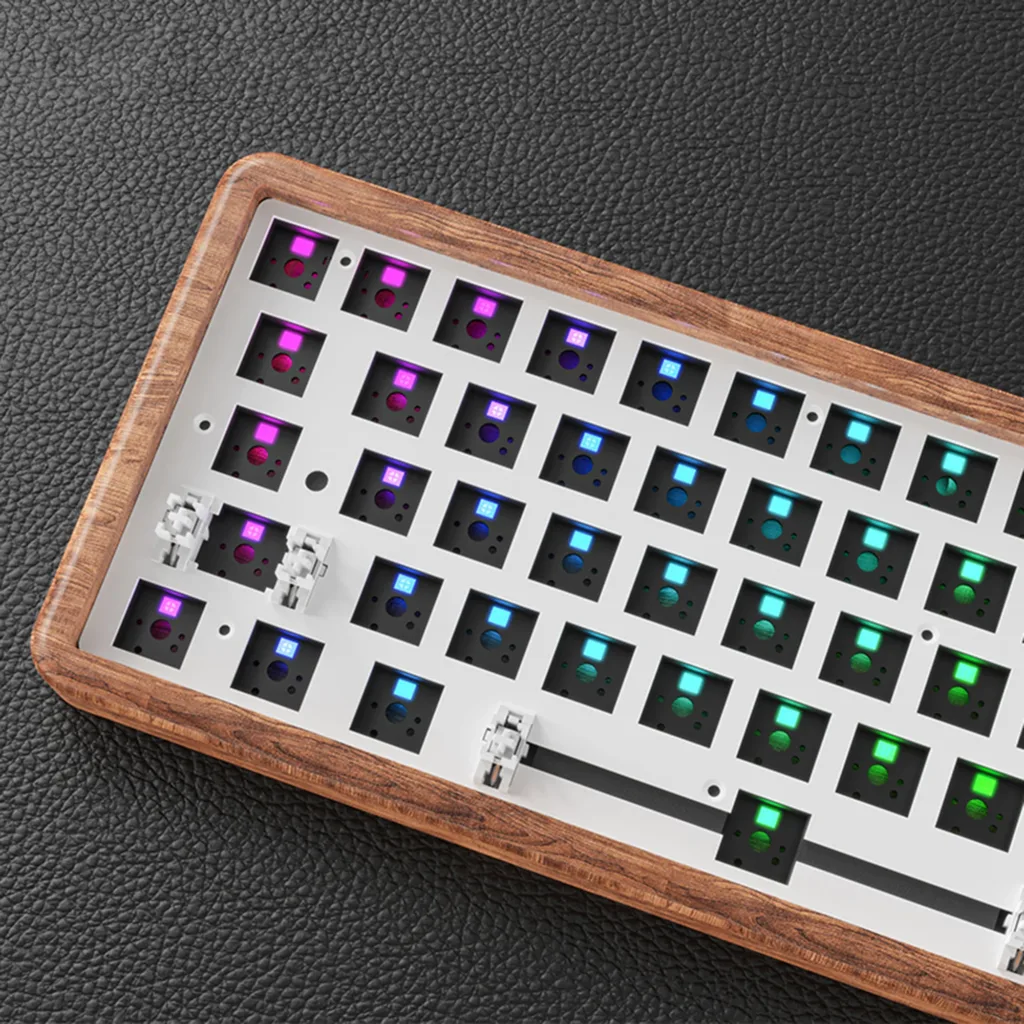
The case is the foundation upon which everything else is built. It’s the outer shell that protects all of the precious innards and gives the keyboard its overall shape and style. There are several different types of cases to choose from, depending on your needs and preferences. Some factors to consider may include, size and layout, material used in construction, weight of the case, and whether or not you like the overall aesthetic of the case.
When purchasing a case, it will generally come with everything except switches, keycaps, and stabilizers.
Pick a case according to the size you’ve decided to go with in Step 1.
There will usually be two PCB options, Hot Swap or Solder, choose the option you’ve decided with from Step 3.
Typing Angle
Most Keyboard cases will not have built-in adjustable feet. Instead, you’re going to have to either glue some rubber feet to the bottom, or slide in your Pokemon cards to precisely adjust the typing angle. Make sure you refer to the product description for the built in typing angle of the case. Otherwise, your keyboard’s tilt might tilt you.
Plate
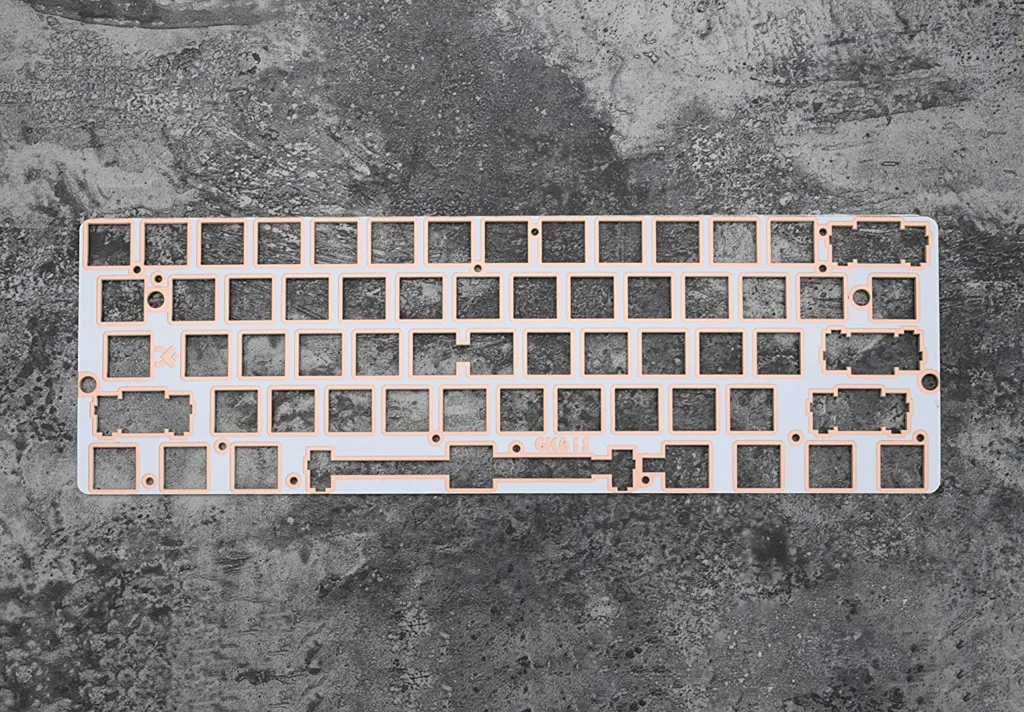
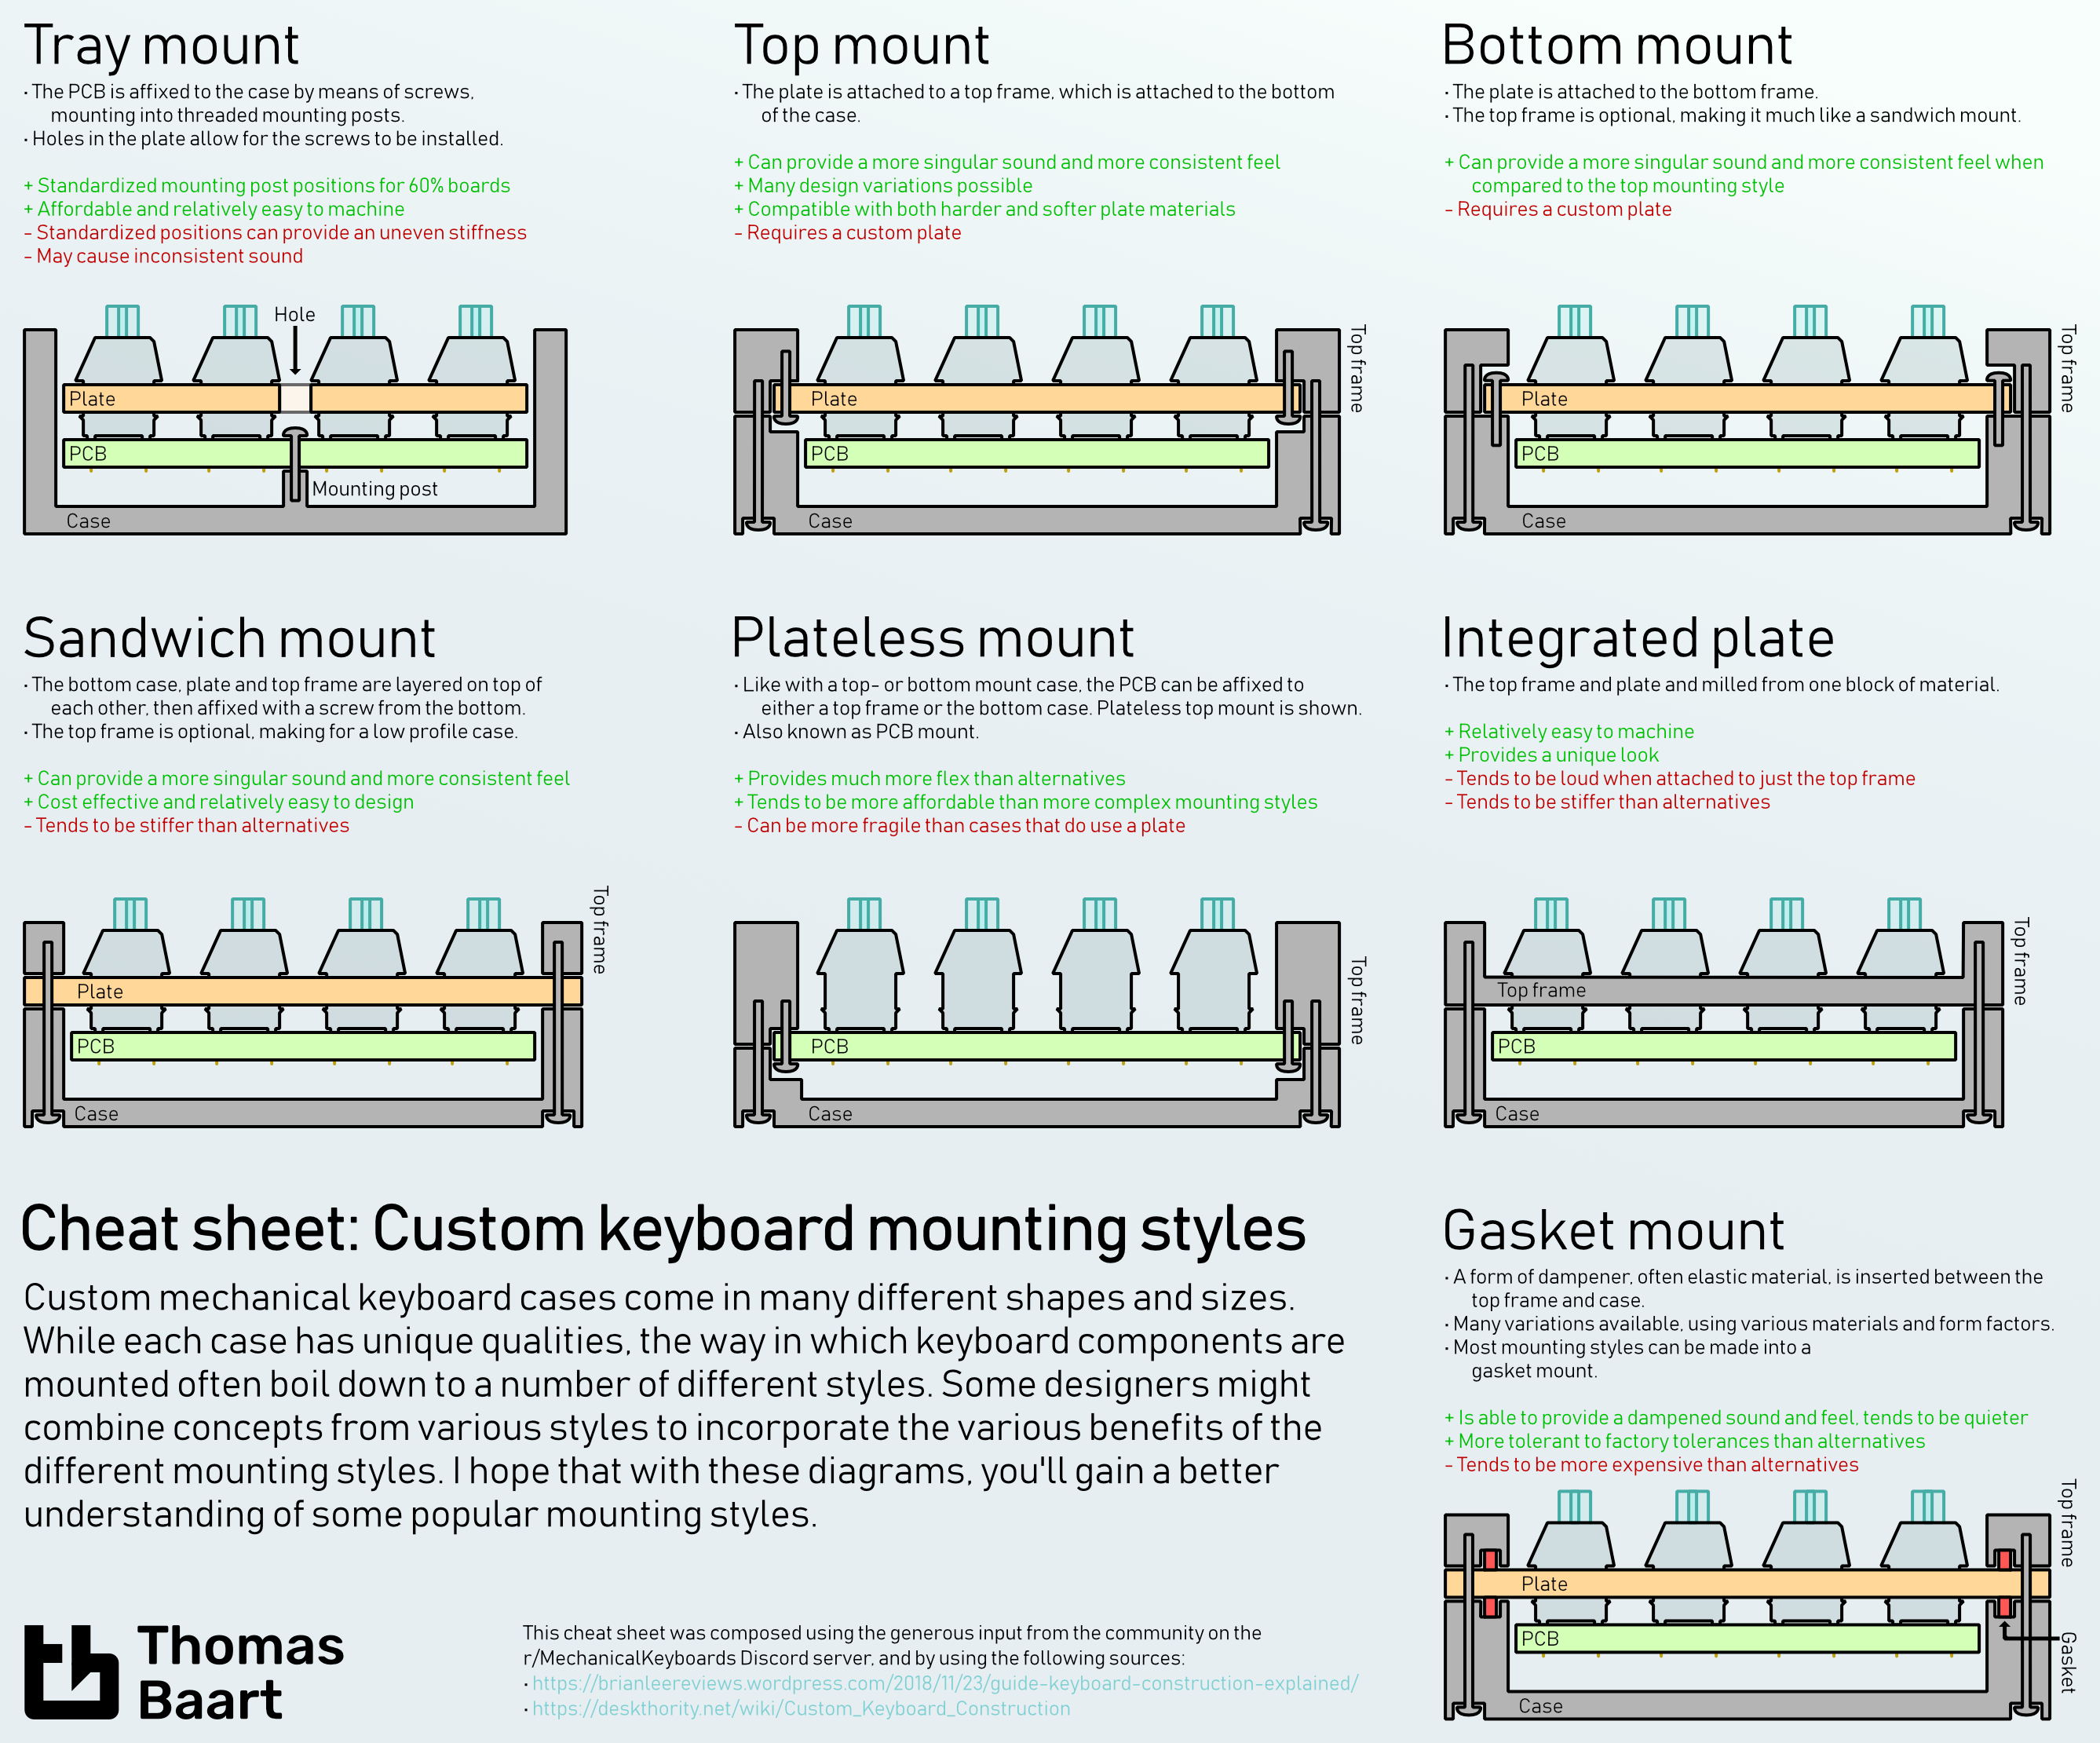
The Plate is a structural element of a mechanical keyboard that provides rigidity and support for the switches and keycaps. It is typically mounted on top of the PCB. The plate helps to distribute the force of the switches evenly and can also help to dampen any vibrations or noise that may be generated when the keys are pressed. The plate is generally made of plastic or metal, including aluminum, brass, and steel, each with its own unique properties and characteristics.
There are many plate mounting styles, including tray mount, top mount, bottom mount, sandwich mount, plateless mount, integrated plate, and gasket mount. If you want a more in-depth explanation to each of the mounting styles, including the pros and cons of each mounting style, please refer to this comprehensive cheat sheet made by Thomas Baart.
The Plate will usually come bundled with the Case along with the PCB to ensure compatibility. However, some retailers will have separate options available for purchase, please refer to the retailer/manufacturer’s website for compatibility between the plate, PCB, and Cases offered.

Stabilizers
Stabilizers (stabs) are mechanical components that are used to ensure consistent and smooth keystroke movement in a mechanical keyboard. They are typically used on larger keys, such as the space bar, shift keys, and enter key, which have a longer travel distance and are more prone to wobbling or bouncing when pressed. Stabilizers generally come in two types, wire and costar-style.
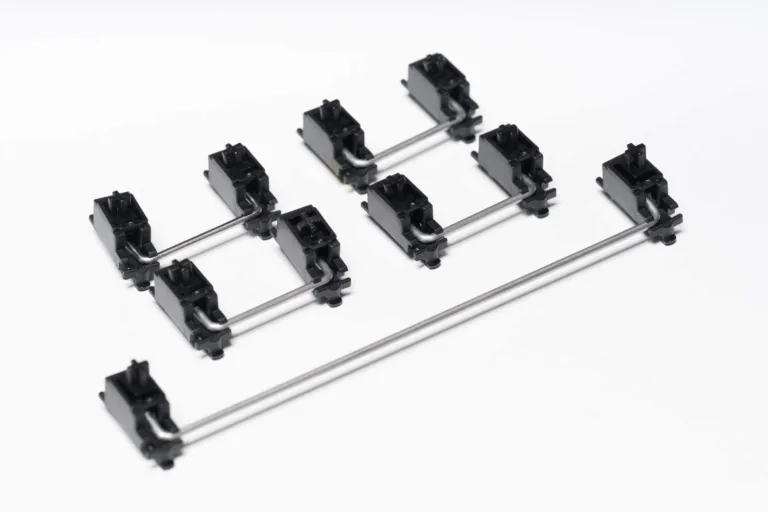
Cherry Stabilizers
Cherry stabilizers consist of a wire and plastic guides that hold the wire in place. The keycap is then attached on to the stems of the plastic guides. Cherry stabs are mounted either onto the plate or PCB. Cherry stabilizers are the most common and most popular stabilizers and come in the following mounts.
Plate Mounted
Just as the name suggests, the stabilizer will attach directly on the keyboard plate via inserts or clips. They’re usually found in pre-built keyboards and offers decent stability. However, because they’re mounted directly to the plate, they’ll receive more vibration since force is transferred from the switches to the plate first.
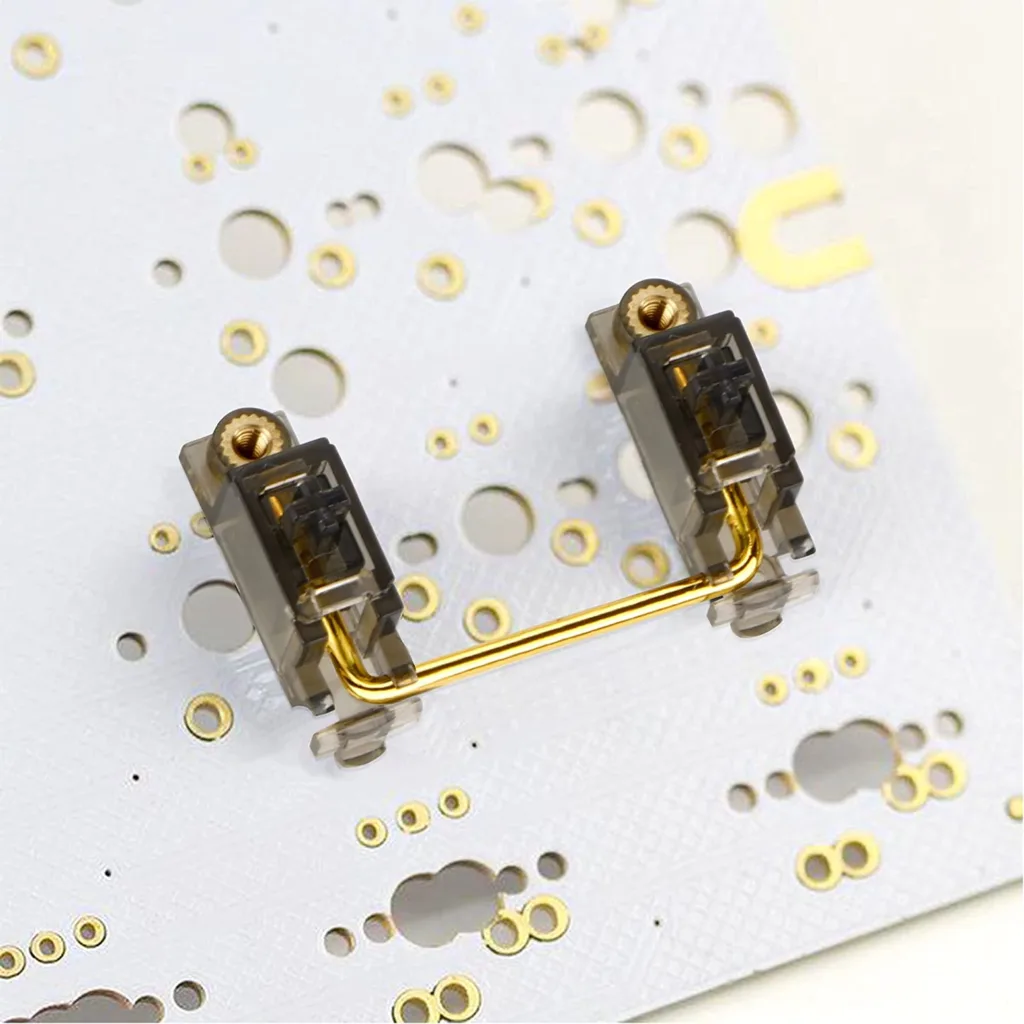
Screw-In
Screw-in stabilizers are the most popular choice because they can be easily replaced and modded. Screw-in stabs are also less prone to vibration and offer the best stability. Screw-in stabilizers are attached to the PCB with screws on each of the plastic guides.
Snap-In
Snap-In stabilizers are the easiest to install, since they require no tools and are installed to the PCB via small clips on the plastic guides. However, they’re the least stable mounting type and tend to vibrate more than screw-ins. Snap-In stabilizers are also prone to popping out from the PCB when removing keycaps.
We recommend you go with screw in Cherry Stabilizers to start. Such as these Durock V2.
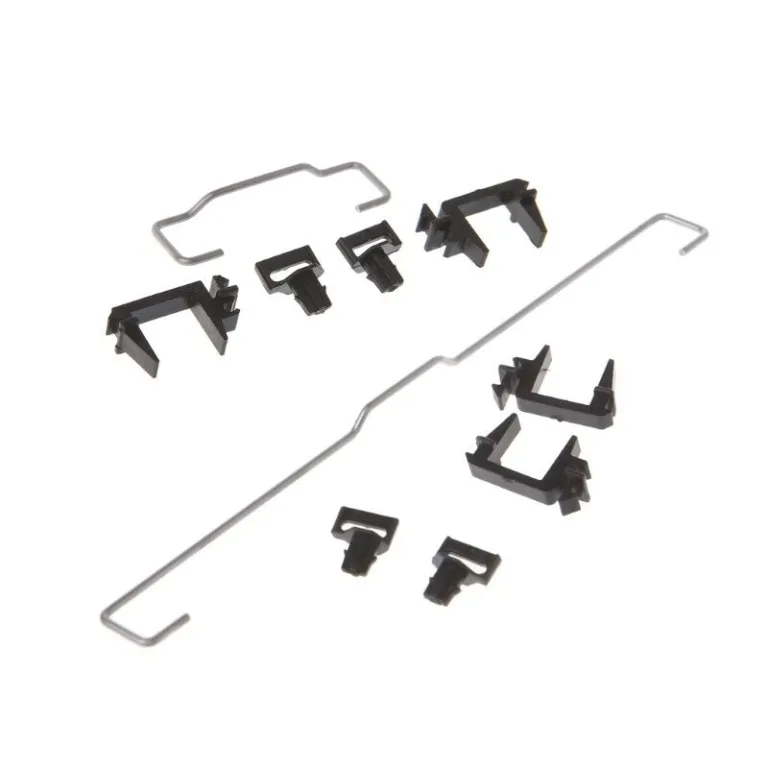
Costar-style Stabilizers
Costar-style stabilizers are typically found in older keyboards, and are generally less common. Costar stabs are plate mounted and utilize a wire with hooks on each end to hook into the slots on the bottom of the keycap, and the other ends secured by plastic inserts which connects to the keyboard plate. Because of this design, it makes swapping out keycaps much more difficult and requires compatible keycaps to function.
Cherry and Costar Stabilizers both use a separate cutout. You cannot swap out your cherry stab for costar stabs and vice versa.
How Many Stabs Does it Take
Depending on the keyboard size you’re going with, you’ll need different number of stabilizers. Below is an example of how many stabilizers you’ll need for the layouts sorted according to the keyboard size guide from the Choose a Keyboard Size section. Use it as a reference, calculate the specifics based on your components.
- 100% – 7x 2u + 1x 6.25u/7u
- 1800 | 96% – 6x 2u + 1x 6.25u/7u
- 80% | 75% | 65% | 60% – 4x 2u + 1x 6.25u/7u
- 50% | 40% – Depends if spacebar is split
As a rule of thumb, you’ll typically need stabilizers for keys that are 2u or more, keys such as the shift, backspace, and enter generally fall into the 2u category; 2u stabilizers also fit on keys that are 2.25u, 2.5u, and 2.75u.
Spacebars are generally 6.25u and will use a 6.25u stabilizer. However, you can also find spacebars that are 7u and will need a 7u stabilizers. There are also split spacebars, in those scenarios, use 2u stabs.
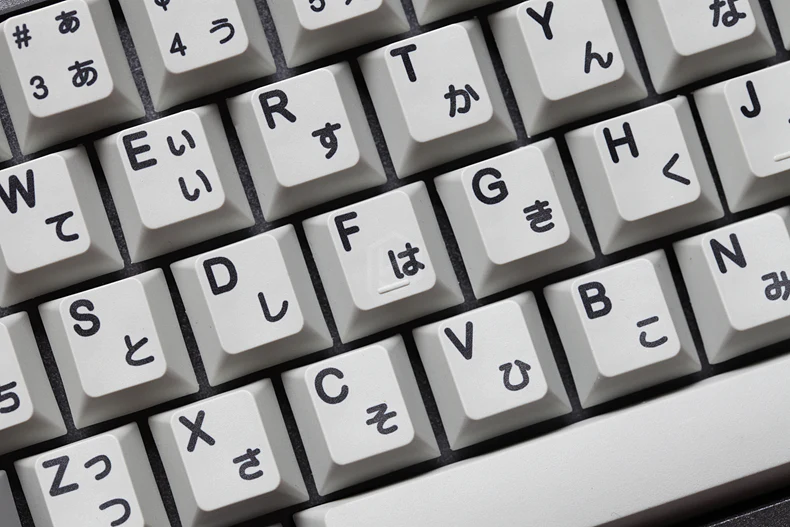
Keycaps
This is the most fun part for most people. Keycaps probably need no explanation but expand on the section below if you need one.
Keycaps are the removable caps that cover the tops of the mechanical keyboard switches. They are usually made of plastic, but can also be made of metal, wood, or other materials. Keycaps can be removed and replaced with keycaps of different colors or materials to change the appearance of the keyboard or to improve the feel of the keys. Keycaps may also be labeled with different characters or symbols to indicate the function of each key. Keycaps are an important part of a mechanical keyboard and can significantly affect the look, feel, and functionality of the keyboard.
When it comes to Keycaps, there are endless customization possibilities. However, there are important factors that you need to look for when buying.
Material
Keycaps are generally made from plastics with ABS (Acrylonitrile Butadiene Styrene) and PBT (Polybutylene Terephthalate) being the most common types. The key differences between them are texture, durability, hygroscopicity, and cost.
PBT
Durability – More durable, less prone to developing shine, cracks, and breaking
Hygroscopicity – Less hygroscopic, absorb less moisture from the air, less prone to developing a “shine” or greasy feel over time.
Cost – Generally more expensive
ABS
Durability – Less resistant to wear and tear compared with PBT
Hygroscopicity – More hygroscopic, may develop a shine or feel greasy over time
Cost – Generally cheaper than PBT
However, this comparison is comparing your run of the mill ABS. For premium keycaps made by GMK, they use premium ABS. ABS is generally still preferred for “High End” keycaps given their “softer” feed.
Profile
Keycap profiles refer to the shape and height of the keycaps on a mechanical keyboard. Different keycap profiles are designed to cater to different typing styles and preferences.
Here are some common keycap profiles that you may come across:
- OEM: OEM (Original Equipment Manufacturer) keycaps are the most common keycap profile. They are tall and have a cylindrical shape, with a curved top and a flat bottom. OEM keycaps are popular for their balance of comfort and functionality.
- Cherry: Cherry keycaps are similar to OEM keycaps in shape, but they are slightly shorter and have a more pronounced slope from the top to the bottom of the keycap.
- DSA: DSA (Double Shot ABS) keycaps are short and have a uniform, cylindrical shape with a flat top and bottom. They are known for their compact design and are popular in small form factor keyboards.
- SA: SA (Spherical-Allover) keycaps are tall and have a spherical shape with a rounded top and bottom. They are known for their unique look and comfortable typing experience.
For a visual of different profiles, click here. Visual created by u/gtderEvan.
Legend
The Legend, or simply the keycap labels or keycap printing, referring to the characters or symbols that are printed or engraved on the tops of the keycaps. Legends can be printed or engraved using different methods. The method used to create the legends will affect the quality and durability of the labels.
Here are some commonly used methods for printing keyboard legends:
- Pad printing: Pad printing is a common method for printing keyboard legends. It involves transferring ink from a plate to the keycap using a silicone pad. Pad printing can produce high-quality legends, but the ink may fade or wear off over time.
- Laser etching: Laser etching involves using a laser to burn or vaporize the material of the keycap to create the legend. Laser etching is a durable method that produces high-quality legends that are resistant to fading or wearing off.
- Dye sublimation: Dye sublimation involves transferring ink from a film to the keycap using heat and pressure. Dye sublimation can produce high-quality, long-lasting legends with vibrant colors, but it is a more expensive method.
- Double-shot injection molding: Double-shot injection molding involves injecting two different colors of plastic into a single mold to create the keycap and legend. This method produces very high-quality, long-lasting legends that are resistant to fading or wearing off.
Overall, laser etching and double-shot injection molding are generally considered to be the best methods for producing high-quality, durable keyboard legends.
If you care about your RGB lights passing through your keycaps, you’ll want something that’s double-shot with a translucent underlayer. If you don’t care much for RGB, dye sublimation keycaps can be a great option as well if done right.
Compatibility
Keycap compatibility refers to the ability of keycaps to fit onto a specific keyboard. Different keyboard brands and models may use different stem designs and layouts, which can make it difficult to use keycaps from one keyboard on another keyboard. It’s important to consider keycap compatibility when choosing keycaps for your keyboard.
Here are some factors that can affect keycap compatibility:
- Stem design: The stem is the part of the keycap that fits onto the switch of the keyboard. Make sure to refer to the product description for switch compatibility.
- Key layout: Keyboards with a non-standard layout, such as a tenkeyless (TKL) or 60% layout, may not be compatible with keycaps designed for a full-sized keyboard.
- Switch type: The type of switch used in a keyboard can also affect keycap compatibility. Some keycaps may be designed to fit a specific type of switch, such as Cherry MX or Kailh switches.
NOTE: Make sure you’re choosing keycaps that are also row compatible with your chosen keyboard size and layout if you don’t want to end up with something like this.
There are also keycaps called Artisans, which are unique custom keycaps such as this one. You can purchase Artisans on top of your keycap set to take the customization even further. But do note, they might run your wallet dry.
Extras
Here are some additional accessories you can get to enhance your aesthetic.
- Coiled Cables
- Artisan Keycaps
- Case Badges
Modding
Modifying or Modding in short, is the process of altering any components or parts, to change it’s look, feel, sound, function, etc. Modding your keyboard can greatly enhance the user experience if done right. When it comes to modding custom keyboards, a whole website can be built to explain the existing techniques and introduce new techniques, we’re going to give some you examples and introduce you to some popular modding techniques. Below are some of the components and the mods you can apply to them.
Keycaps
O-rings
O-rings are small rubber rings that are can be placed on the stem of a keycap. They are used to dampen the sound of the key when it is pressed and to provide a more tactile feel. When a key is pressed, the O-ring will compress and absorb some of the force, which can make the keystroke feel softer and more muted.
Switches
Below are some of the things you can do to your switches to improve their sound and feel. We highly recommend you lube your switches if you have linear or tactile switches. However if you have clicky switches, lubing clicky switches will dampen the sound and may result in a more “linear” feel. Lubing clicky switches may also cause them to produce inconsistent “clicks” across various keys. You can try it out on a single switch and see if you prefer the lubed version of a click switch.
Lubing
Lubing your mechanical switches can drastically improve it’s feel and sound. You’ll need:
- Switch Opener – Unless you want to rip your fingernails out, use a switch opener.
- Lubricant – Use 2050G for the stem and housing, use 105 for the springs. We recommend this bundle with both included.
- Fine Brush – What are you going to use, your fingers?
- Stem Holder (optional) – Use a stem holder to more easily brush the lube on the stems.
- Plastic Ziploc Bag (optional) – Optional if you want to lube the springs in the switches, lubing the springs greatly reduce any “pinging” noise from the springs bouncing back.
Use the switch opener to open the switch, and dip your brushes in the 205 lube and get a gentle amount. Then brush the sides of the switch stem as well as the switch housing itself, this will eliminate any “scratchy” sound and feel. Avoid the legs if you’re lubing a tactile switch.
For your springs, place them in a Ziploc bag, drip 1 drop of lube per 10 springs (play around with this). Seal the bag and rub the lube onto the springs. The goal is to have just a nice even coat of lube on the springs.
Now is the perfect time to add any Switch Films if you’re planning to, since the switch is already disassembled.
After you’ve lubed everything, reassemble the switches.
Adding Switch Films
Switch Films are rubber or foam pieces that go in-between to top and bottom half of the switch housing. The purpose of switch films are to close the gap between the housing as much as possible to reduce switch wobble. Eliminating switch wobble will give you more of that “THOCC” sound.
Use a pair of tweezers to place the films onto the bottom housing.
Changing the Springs
You can change the springs inside the switches to increase or decrease the resistance of the key press, or actuation force.
Stabilizers
Clipping the Feet
Some Cherry stabilizers will have protrusions on the bottom of the housing, you’ll want to clip that off to ensure the stabilizer sits flush once it’s mounted. The “feet” or “fangs” were believed to be originally designed to dampen out the force when bottoming out the stabilizer, but this design causes the stabilizer to feel mushy when bottoming out.
Lubing the Stabs
Similar to lubing your switches, you can lube the stabilizers as well to improve its feel and sound. Keyboard enthusiasts will lube everything, including their fingers. We’ll explain how to lube Cherry Stabs. You’ll need:
- Lubricant – Use 2050G
- Fine Brush – Use 00 or 000 brush
Disassemble the stabilizer, and remove the stabilizer stem from the housing. Then with your brush, take a rice grain size amount of lube, and dot the longer sides of the stabilizer housing. Use the remaining lube on the shorter sides and do this for all the stabilizers.
For the stabilizer wire, you’re going to want to apply a generous amount of lube evenly onto the wire, and slightly past the where the bend on the wire is. The goal here is to reduce the impact of the wire against the housing which causes rattling, with a layer of lube but not so much where the key feels sluggish.
Bending the Wire
Check your stabilizer wire to make sure there’s no weird bends in the middle, and that the sides are bent at a 90 degree angle. Bend the wire if necessary back to reference point. Usually the wire won’t come bent on Cherry Stabs and are a more common occurrence on Costar Stabs.
Padding the Stabs
Adding padding between the PCB and the stabilizer can greatly reduce the sound generated when the key is pressed. It can also provide a sort of rebound feeling based on the padding material. A common way to add padding is using cut out pieces of a fabric Band-aid and sticking that on the PCB where the stabilizer would be mounted. But if you don’t want to cut your own Band-Aid, you can use pre-made pads such as this one.
Another popular mod people like to apply to their stabilizers is called the Holee Mod. Which a small strip of Band-aid is cut and stuck in the bottommost hole of the stabilizer stem. This helps tighten tolerances and holds the wire more snugly, which prevents rattle and ticking. I recommend you check out this video to find out more.
Case
Padding the Case
Adding padding to the inside of your keyboard case can reduce rattle and improve the acoustics of your keyboard. The most popular materials used is Sorbothane and Shelf liners, but you can also use Neoprene or Epom acoustics foam. Hell, you can even just use regular packing foam. We recommend experimenting with different materials and see what feel and sounds the best to you.
There are vendors which sell precut materials for different keyboard sizes, but I find that the cheaper and better option is buy the materials on amazon and cut them yourself since your keyboard case can vary and you can always stuff more material to fill any gaps.
Be sure to measure out the gap thickness inside your case between the case and the PCB before buying.
Adding Rubber Feet
Adding rubber feet to your case will make your keyboard more stable and dampen vibrations. Adding rubber feet to the bottom of your case can also alter your typing angle. You can simply use the leftover padding materials if you’ve padding the case to make the rubber feet and glue them onto the case if your case does not come with preinstalled feet.
Assembling the Components
After you’ve gathered all the tools and modded your components, now comes the fun part, Assembly.
Step 1: Test Your PCB
Before you mash things together, the first thing is to test all the connections on your PCB. To do this, you’ll need to plug in or pair your PCB with your computer. After it’s plugged in, go to a free keyboard tester website such as this one. Then insert each end of a tweezer into the opposing slots where the switch connectors would go. This will close the connection on that key slot of the PCB and fire a signal. If the key is working, you should see it reflect on the website. Repeat this for all the keys until you’ve gone through every single connection.
You must do this step to FIRST to avoid having to disassemble everything later because you’re unable to use Ultimate or Reload due to your R key not working.
Step 2: Prep Your Case
Give the inside of your case a nice wipe and ensure you didn’t leave your tools inside the case.
Step 3: Install Stabilizers onto the PCB
Note which type of Stabilizers you have, screw, snap, insert, or slide them into the appropriate slots on the PCB.
Step 4: Install the Plate
Align your plate with the PCB, if there are any screw holes, take your precision screwdriver and secure it in place.
Step 5: Install the Switches
Slot your lubed/dry switches into each slot, make sure you didn’t forget Step 4 or else you’ll have go pluck out everything and repeat this step again.
If you have a Hot-Swap PCB, make sure the pins on each switch is touching the connection points on the PCB and you’re pretty much good to go.
But if you have a solder PCB, we’ll do a guide on how to solder in the future. For now check out this Keyboard Soldering and Desoldering for Beginners video.
Step 6: Slot Everything Into the Case
Now that you have the meat of your keyboard assembled, carefully plop your assembled PCB into your case and screw everything in place.
Step 7: Install the Keycaps
Note which size and layout you have, and fit the appropriate keycap on each slot, if you don’t remember what goes where. Refer to your old inferior dusty pre-built keyboard or this guide as a general reference.
Step 8: Test Your Build
Go back to the keyboard tester website and test everything again to make sure everything’s gone right.
Then try out a typing test, you should now have a keyboard with superior looks, feel, and sound.
Conclusion
Congratulations, you made it to the end of our guide to building your first custom mechanical keyboard! By now, you should be well-equipped with the knowledge and skills to turn your dream keyboard into a reality and create the ultimate centerpiece.
But let’s not forget the best part – the feeling of accomplishment you’ll get when you finally type out that first sentence on your brand new, one-of-a-kind keyboard. It’s a feeling like no other, and we’re confident that you’ll be hooked on the custom keyboard building world from here on out. The only path forward is to Build More!
So go forth, fellow keyboard enthusiasts, and create the ultimate typing machine. Don’t forget to share this guide if you’ve found it helpful and tag u/realDerele on r/MechanicalKeyboards with your latest creation – can’t wait to see what you come up with! Thanks for reading.
Feel free to drop a comment and contact us at [email protected] for any suggestions or feedback!
